A. Linking scenes
Now that we have two scenes in our campaign–an introduction and a battle–let’s talk about how to make the game progress from one to the other so that we can actually play through them both!
![]() Every scene in the game, whether it’s a cut scene or a battle, has an attribute inside its Level tag called nextbattle. If nextbattle is set to none, then the game will return to the title screen as soon as the scene ends. To make the game progress to another scene instead, we need to change nextbattle to the filename of that other scene (minus the .xml extension).
Every scene in the game, whether it’s a cut scene or a battle, has an attribute inside its Level tag called nextbattle. If nextbattle is set to none, then the game will return to the title screen as soon as the scene ends. To make the game progress to another scene instead, we need to change nextbattle to the filename of that other scene (minus the .xml extension).
Let’s open up Introduction.xml again in our text editor. See where it says nextbattle=”none” on the top line? Change none to the filename for your new battle, minus the .xml extension. (Since I saved my battle as Pond Battle.xml, I tell the game to progress to that battle using nextbattle=”Pond Battle”.)
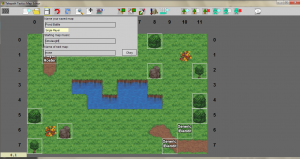
 With battles, you don’t have to set nextbattle by hand; you can use the map editor! You may have noticed that the Save Map menu gives you the option to designate “Name of next map”–that sets the battle’s nextbattle attribute for you. Change it from none to the next scene’s name, just like we did above.
Now that we’ve linked our scenes, save Introduction.xml and run Telepath Tactics. Click New Campaign, then select your campaign from the dropdown menu. You should see your scrolling introduction; after it’s over, the game should send you to the battle you created!
You now know enough to create a super basic campaign: you can just keep creating new battles, then link them to each other in a sequence via their nextbattle attributes. That’s really all it takes to make a full campaign.
B. Battle Conditions
However, we’re not content just knowing how to do the bare minimum, right? We want to learn how to make battles with more variety! That means we need to learn to work with conditions, learn how to add inventory items to characters and objects, learn how to use tags, and eventually, learn how to script.
We’ll start with conditions, since those are the easiest to employ. Conditions are XML tags that tell the game to change the basic rules or appearance of a battle. Telepath Tactics supports 20 different conditions; Modding Section C of the manual spells them all out in great detail. For now, though, we’re just going to look at a few non-cosmetic conditions that you’re likely to use a lot:
Deployment – this is used to enable the unit deployment / reserve supplies interface at the start of a battle. To use this, paste <Condition>Deployment,true</Condition> in your battle’s XML file.
Fog of War – this is used to cover the battlefield in fog of war (and at the same time, makes it so character movement cannot be undone). To use this, paste <Condition>Fog of War,true</Condition> in your battle’s XML file.
Go First – this lets you pick an army other than the player’s to go first in this battle. (If you don’t use this condition, the player always goes first by default.) To have army 1–the default enemy army–go first, paste <Condition>Go First,1</Condition> in your battle’s XML file.
Post-Battle Looting – this is used to have the game automatically place any loose item sacks into the player’s reserve supplies when the battle ends. To use this, paste <Condition>Post-Battle Looting,true</Condition> in your battle’s XML file.
Protect Char – short for “protect character,” use this if you want an army to lose as soon as a particular character dies. This condition takes two parameters: army number and name of character to protect. (Remember: the player is always army 0, and the enemy is usually army 1.)
So let’s say we want the player to lose the battle if Ann Veal dies; we would paste <Condition>Protect Char,0,Ann Veal</Condition> in our battle’s XML file. Or suppose that the battle contains a boss named General D-bag, and we want the player to win as soon as General D-bag is slain; we would paste <Condition>Protect Char,1,General D-bag</Condition> in our battle’s XML file.
 Go ahead and open up your battle’s XML file in the text editor; the file should be in your campaign’s Maps folder. Now just stick whatever conditions you want to use in the battle inside the file, within the Level tags (but outside of any other tags). For my part, I decided to turn on post-battle looting, make the enemy go first, and make it so the player loses the battle if Ann Veal dies.
Whenever you’re done, save the XML file.
That should do it for now! In our next tutorial, we’ll add inventory items to characters and objects, and learn some basic character tags that we can use to influence enemy AI behavior during battles.


