Greetings, everyone, and welcome to the first part of a series of tutorials where we learn how to create new campaigns in Telepath Tactics, step by individual step! As we go, feel free to refer to the Telepath Tactics manual, which provides thorough documentation on every last thing you can use while modding the game.
Before we start, download the map editor (don’t worry, it’s free!) and install it. We’ll need it pretty soon:
Windows editor | Mac editor | Linux editor*
* if you’re getting the Linux version, make sure to nab and install AIR first! I’m planning to create a Linux installer that doesn’t require this, but I’m not there just yet.
Got it? All ready? Let’s begin!
A. Create a campaign folder
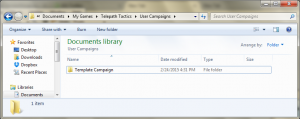
The directory for user-created campaigns is Documents > My Games > Telepath Tactics > User Campaigns. Whenever we create a new folder in this directory, Telepath Tactics will auto-detect it and add the folder’s name to the New Campaign list in-game.
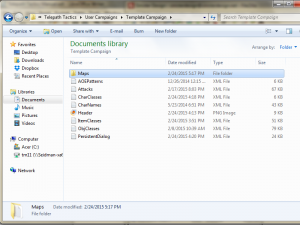
We can’t just create an empty folder and expect that to work, though! There are seven files that the game needs in order to run a campaign:
- AOEPatterns.xml
- Attacks.xml
- CharClasses.xml
- CharNames.xml
- ItemClasses.xml
- ObjClasses.xml
- PersistentDialog.xml
 Rather than create all of these from scratch, let’s work off of a template campaign. Click this link to download the zipped template campaign, then unzip the file.You should now see a folder named Template Campaign. Just drag and drop that folder into Documents > My Games > Telepath Tactics > User Campaigns, then rename it to whatever you want to call your campaign.
B. Create an introductory narration
 Within each campaign’s folder, you should see those 7 XML files I listed above, plus Header.png and a subfolder named Maps. Open Maps; inside, you should see an XML file named Introduction.
Every single Telepath Tactics campaign starts with the Introduction scene! This is the scene where you begin your campaign’s story, either via narration or a dialog cut scene. We’ll start with narration here, since it’s easier to learn how to do.
Let’s open up Introduction.xml and start editing. (A quick note about editing XML files: any basic text editor can do this, but some programs are better than others. Notepad++ is a free, excellent XML editor for Windows; Mac and Linux users can try Sublime Text, which I hear good things about.)
Inside Introduction.xml, you should see three tags: <Level>, <NewRoster>, and <Narration>. Ignore the first two; we’re just going to work with <Narration> for now. Between the opening tag (<Narration>) and the closing tag (</Narration>), you’ll see some text which reads Write your scrolling text introduction here. Delete that text and do what it said: write your campaign’s introduction right where the text was, in between the opening and closing Narration tags.
To make the game start a new paragraph, insert a capital N between two hyphens, like so: -N-. This, then, is a two-paragraph introduction you might write (if you were a terrible writer):
Once, on the peaceful isle of Bunnysmile, there lived an evil skiakineticist named Captain Haterade. Captain Haterade hated all of the peaceful, happy people of Bunnysmile, and he set out to ruin their happiness with lots of unnecessary griping.-N-…oh, and bandits. He also had lots of bandits.
Okay! We’re done with Introduction.xml for now, but we’ll be back later to add a couple of things. Save the file and exit.


