A. Creating a starting army roster
Okay! Now that we have a couple of playable characters, it’s time to return to our campaign’s Introduction.xml file and put them into the player’s army roster. This will make it so the game treats them as recruited characters that can be deployed in future battles.
![]() Between the opening tag (<NewRoster>) and the closing tag (</NewRoster>) of Introduction.xml, you’ll see some text which reads Put the names of the characters the player starts with here. Delete that text; that’s where we are going to put the charnames for our starting player characters, separated by commas, like so:
Between the opening tag (<NewRoster>) and the closing tag (</NewRoster>) of Introduction.xml, you’ll see some text which reads Put the names of the characters the player starts with here. Delete that text; that’s where we are going to put the charnames for our starting player characters, separated by commas, like so:
<NewRoster>Ann/Veal,Tobias/Funke</NewRoster>
That’s it. Save the file and close it–it’s time to create a battle!
B. Painting a battlefield
With a narrative introduction, characters, and an army roster now set up, it’s time to create our first  battle using the Telepath Tactics map editor! (If you didn’t get the map editor already, go back to Part 1 and grab it, then return here.)
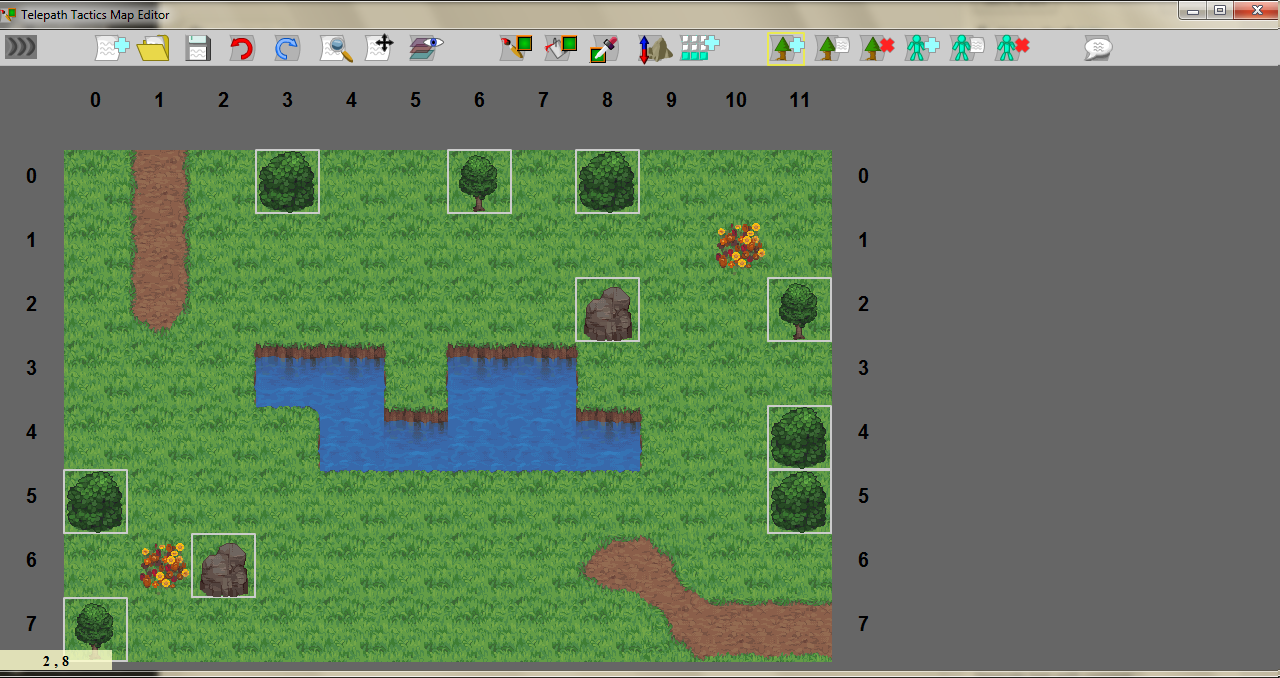
Open the map editor. The program opens with a blank battlefield 12 tiles wide and 8 tiles high, already present and ready to edit. If you want a battlefield with different dimensions, you can (1) create a new battlefield with custom dimensions by clicking New Map, or (2) change the dimensions of the existing battlefield by clicking Add Row or Column.
It’s time to start painting tiles onto the battlefield! Click the New Fill button (it looks like a paint bucket) and select a tileset from the drop-down list. The tiles belonging to that tileset will appear for you to browse through; click a tile to automatically fill the map with copies of that tile.


Once you’ve filled the map with a base tile, use the New Paint tool to select other tiles from the set and draw them onto the map, filling it out with impassable areas and details.


If you want to add large impassable areas to the map, I’d recommend using water, lava, or chasm tiles. The game’s base water and chasm tiles can be found in the Grass tileset, while the base lava tile is in the Cave tileset. For areas that you want to be impassable even to flying characters, like the interior of solid rock, you can use tile0001 in the Blank tileset.
C. Adding destructible objects
Next, we’ll add a few destructible objects to make the terrain a little more interesting. Since I opted for a pastoral outdoor map here, I’ll most likely be using boulders, trees, and bushes.
Click New Object to open the object placement menu. Before we pick our object, we have to specify the pool we’re drawing from–select the name of your new campaign from the second dropdown. Then, click the first dropdown and select the destructible object you want to place. You can then left-click anywhere on the map to place copies of that destructible object!

D. Adding characters
Finally, we need to add characters to the map. We’ll add the player’s army first, then add enemies.
Click New Character to open the character placement menu. Your campaign should already be selected in the Class Pool dropdown list, but if it isn’t, go ahead and make sure it is now.
Ignore that first dropdown, Character class, for now–while placing spawn points for the player’s army, we want to just leave this as From Player’s Army. This way, the game will auto-populate the spaces we pick with whatever characters the player has recruited, excluding any who have died. (If we were to pick characters by name, on the other hand, those characters would show up no matter what, even if they had died or hadn’t been recruited! As far as the player’s army is concerned, you only want to do this for special plot-specific guest characters who you know for sure couldn’t have been killed yet.)
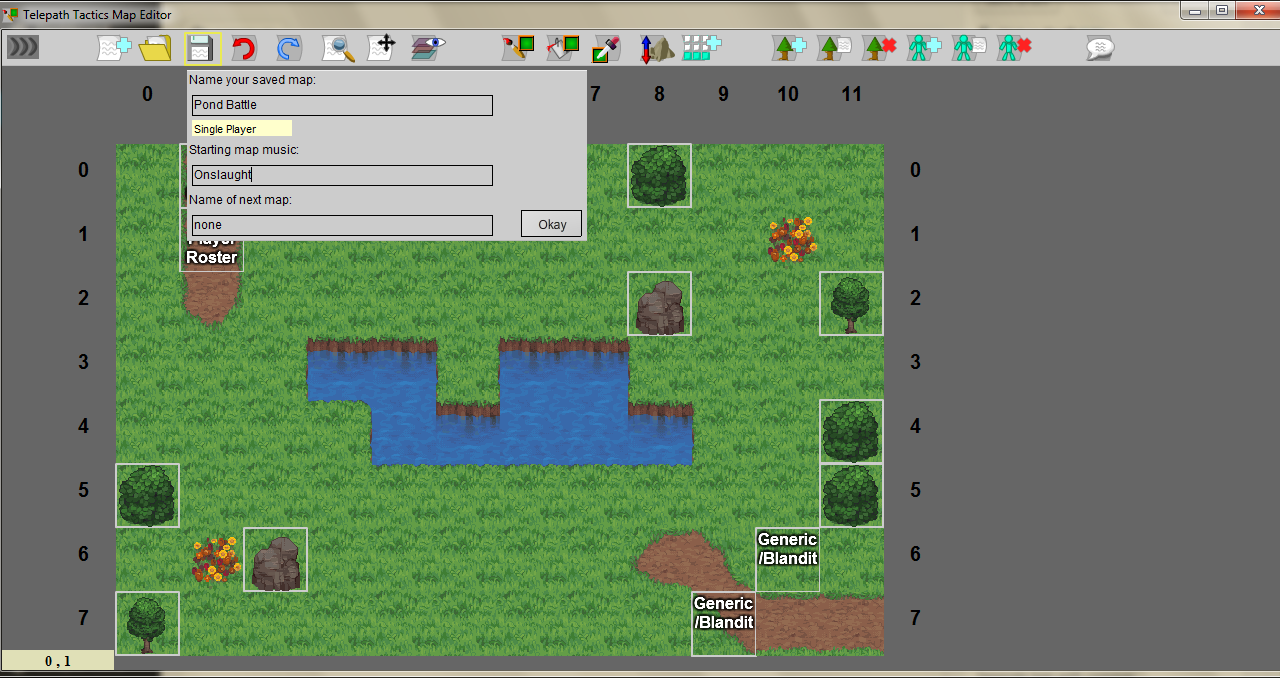
You should notice two final dropdown lists in this menu: Facing and Team. Select whatever direction these characters should be facing when the battle starts, and select 0 for Team. (Army 0 is always the player’s army.) Now, left-click anywhere on the map to place spawn points for the player’s characters.
All done? Now change Team to 1, set Character Class to Generic/Blandit, change facing to the appropriate direction, and paint a couple of enemies onto the map.


Voila! We now almost have our first playable battle. We just have to do one more thing…
E. Saving the battle
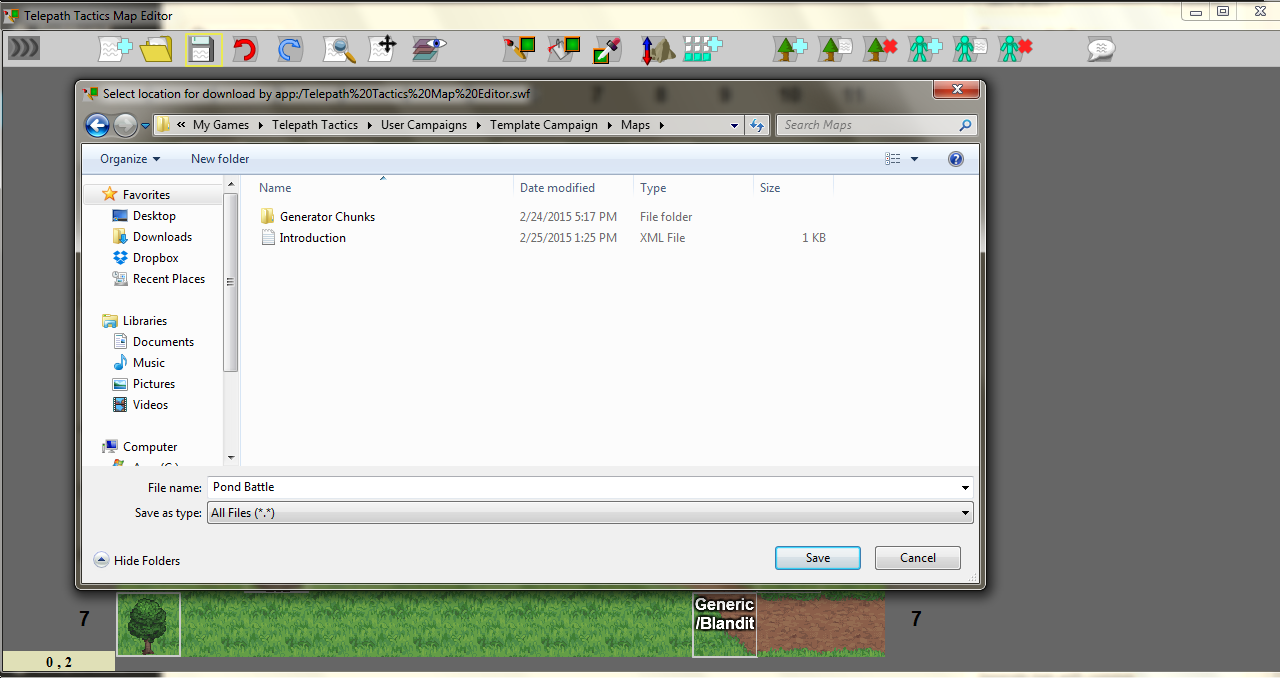
Click Save Map. You should now see a dropdown menu where you can select Multiplayer or Single Player; select Single Player. Type in a name for your battle and click Okay, then save it in your campaign’s Maps folder:
If you want, before you click Okay, you can change the battle’s music in this menu. Your music options are as follows:
- BadOmen – forboding music anticipating danger.
- BattlePrep – an upbeat military march.
- CheckingOutTheGoods – bossa nova music for romance and casual shopping.
- CityOfTheEmpire – music for a bustling city.
- DeviousSchemes – high-stakes stealth music.
- Dungeon – creepy music for exploring a dungeon.
- EvilLurks – skin-crawlingly creepy music for deeply evil characters.
- FinalBoss – epic battle music for the final boss.
- ForHonor – battle music; the heroes are fighting for something greater!
- FoulServants – boss music.
- FrozenMemories – sad music; for defeat, or at touching or nostalgic moments.
- HerosTriumph – joyous music for a great victory!
- LizardTribe – jazzy tribal music with a digeridoo.
- MythicalCreatures – mysterious music with tribal percussion.
- Onslaught – battle music; standard battle theme.
- Resolve – music indicating steely resolve in the face of adversity.
- RightUnderTheirNoses – light-hearted stealth music.
- ScionOfEvil – boss music.
- ShadyTransactions – music for talking with mercenaries and arms dealers.
- Sisters – sweet music; for times the characters reveal their feelings.
- TacticiansDuel – battle music; alternate battle theme.
- TavernTheme – an upbeat folk tune.
- ThereWillBeBlood – forboding battle music; the calm before the storm.
- TitleTheme – the Telepath Tactics theme song.
- VibraMines – depressing, desolate music for the oppressed.
- VillageTheme – gentle, peaceful music for a quiet village.
That’s all for this part! In the next part, we’ll learn how to link scenes together, and learn how to add conditions to our battles.